Enter to Win a Pair of Adirondack Chairs (Over $500 Value!) | Click Here
How to Clean Upholstered Furniture at Home: A Quick Guide
Before you even think about tackling a spill, the most important work happens. I always tell my clients that a successful cleaning job is 90% preparation. Jumping in with a bottle of cleaner without doing your homework is the fastest way to turn a small spot into a permanent, costly problem.
It’s about understanding the unique piece of furniture in your home. Just like you wouldn't use the same laundry detergent for cashmere and canvas, your sofa's fabric has its own set of rules. Getting this part right isn't just a suggestion—it's the key to keeping your furniture looking fantastic for years.
Decoding Your Furniture Before You Clean
Find and Interpret the Cleaning Code
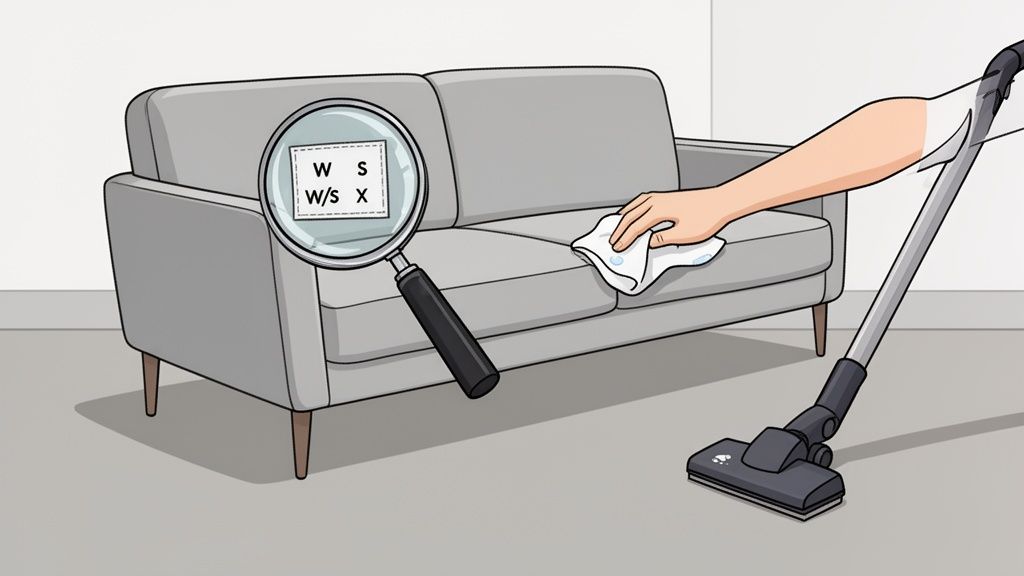
First things first, you need to find the manufacturer's tag. It's usually hiding under a cushion, along a seam on the frame, or on the underside of the piece. This little tag holds the most critical piece of information you'll need: the cleaning code. Think of it as the fabric's care instructions, straight from the people who made it. Knowing a bit about what is upholstered furniture helps you appreciate why these specific codes are so important.
These single-letter codes can seem a bit cryptic, but they're actually quite simple once you know what to look for.
Understanding Your Upholstery Cleaning Codes
Here’s a quick reference guide to deciphering the cleaning codes found on your furniture's tag, ensuring you use the right method for your specific fabric type.
| Code | What It Means | Recommended Cleaning Method |
|---|---|---|
| W | Water-Based Cleaner | You’re in luck. This is the most common code, meaning you can safely use mild soap and water or a water-based upholstery cleaner. |
| S | Solvents Only | Water is the enemy here. Using it can leave rings or cause shrinkage. You must use a water-free, dry-cleaning solvent. |
| W/S | Water or Solvents | This code gives you options. You can use either water-based cleaners or dry-cleaning solvents. Always spot-test first. |
| X | Vacuum Only | The most delicate of all. Do not use any liquid cleaner, water or solvent. Lightly brush or vacuum only. Call a professional for stains. |
These codes are the golden rule for your furniture. Ignoring them is a gamble that rarely pays off.
The Non-Negotiable Spot Test
Once you've found your code and have a cleaner in hand, I can't stress this next part enough: you must do a spot test. It’s a simple step that has saved countless sofas from disaster.
Find an inconspicuous spot—the back of a skirt, under a cushion, or along the bottom of the frame. Apply a small amount of your cleaner to a clean, white cloth and gently dab the area. Let it dry completely. Then, check for any color loss, fabric shrinkage, or rings. If it looks good as new, you're clear to proceed.
Your furniture is a significant investment in your home's comfort and beauty. Taking five minutes to spot test is the single best way to protect that investment. This simple check is what separates a successful DIY cleaning from a costly mistake.
The Power of a Thorough Pre-Vacuum
Finally, before any cleaning solution touches the fabric, give your furniture a really good vacuuming. We’re not just talking about surface-level crumbs. Over time, dirt and microscopic grit get ground into the fibers, acting like tiny bits of sandpaper that wear down the fabric and dull its color.
Use your vacuum’s upholstery attachment and go over every inch of the piece—cushions (both sides!), arms, back, and frame. Then, grab the crevice tool to get deep into the seams where pet hair, dust, and allergens love to hide. You'll be surprised how much better the fabric looks from this step alone. In fact, regular vacuuming can extend your fabric’s life by up to 50%. Here in Virginia Beach, where humidity can be an issue, it also slashes allergens by a whopping 70-90%.
Gentle and Effective DIY Cleaning Solutions
Once you’ve done your homework and prepped your piece, it’s time for the main event. You don’t need to raid the store for harsh chemicals to bring your furniture back to life. In my experience, some of the most effective and safest cleaning solutions are the ones you can mix right in your own kitchen.
These homemade recipes are not only easy on your wallet, but they also give you total peace of mind, since you know exactly what’s touching your furniture and your family. For a truly budget-friendly refresh of your space, remember that the Willis Outlet offers beautiful pieces that make high-end style accessible to everyone. Whether it’s a simple vinegar mix for a durable family sofa or a more careful approach for a delicate armchair, the right DIY cleaner can absolutely work wonders.
The Go-To Vinegar Solution for ‘W’ Code Fabrics
If your furniture’s care tag has a ‘W’ on it, a simple vinegar-based cleaner is your best friend. It’s a brilliant all-around cleaner that cuts through everyday grime and gets rid of odors without leaving any sticky, chemical residue behind. The mild acidity in white vinegar is just perfect for lifting dirt right out of the fabric fibers.
Here’s the simple recipe I always recommend:
- 1/4 cup of distilled white vinegar
- 3/4 cup of warm water
- 1/2 tablespoon of a mild, clear dish soap
Just pour everything into a spray bottle and give it a gentle shake. That little bit of dish soap is the secret weapon—it helps the solution break down oils and lift away dirt much more effectively.
When you’re ready, lightly mist a small section of the upholstery. You’re aiming for damp, not soaked. Grab a clean, white microfiber cloth and gently blot the area, always working from the outside of a spot inward to prevent it from spreading. Follow up with a second cloth dampened with just water to “rinse” it, then blot everything dry with a third, completely dry cloth.
Safely Cleaning ‘S’ Code Fabrics with Solvents
See an ‘S’ code? That means water is the enemy. These fabrics—often natural fibers like silk, cotton, or rayon—can get water-stained, brown, or even shrink if you’re not careful. For these pieces, you have to stick to a water-free, solvent-based cleaner.
You can find commercial dry-cleaning solvents, but for a small spot, simple rubbing alcohol can work in a pinch. Just be sure to spot-test first! Put a small amount on a white cloth (never pour it directly on the furniture) and gently blot the stain. Alcohol is great because it dissolves oily spots and evaporates quickly, which cuts down the risk of moisture damage. Just make sure you’re in a well-ventilated room anytime you’re working with solvents.
If you want to dive deeper into which materials fall into this category, check out our guide on everything you need to know about upholstery materials.
Steam Cleaning for a Chemical-Free Deep Clean
For a truly deep, sanitizing clean that’s completely chemical-free, a home upholstery steam cleaner is an incredible investment. Steam uses nothing but hot water vapor to get way down into the fabric, loosening years of dirt, killing dust mites, and zapping allergens. It’s a fantastic method for fabrics coded ‘W’ or ‘W/S’.
The trick to good steam cleaning is to keep the nozzle moving at a steady pace. Don’t let it sit in one spot for too long, or you’ll oversaturate the fabric. The machine does the hard work for you, spraying the hot steam and then sucking the dirty water right back out. It’s amazing what it can pull out!
Choosing the right cleaning method is about more than just removing a stain—it's about preserving the life and beauty of your furniture. A gentle, appropriate DIY solution protects the fabric's integrity, ensuring your investment remains a centerpiece in your home for years to come.
Thinking about your next furniture purchase? Imagine having a sofa made with a high-performance fabric that’s designed for this kind of easy, gentle cleaning. At the Willis Furniture Design Center, our experts can show you a whole world of custom upholstery options. We’ll help you find beautiful, durable fabrics that not only fit your style but also make your life a whole lot easier when it comes to maintenance.
Tackling Tough Stains Like Wine and Pet Messes
No matter how careful you are, life happens. A splash of red wine during movie night or muddy paws after a rainy day walk don't have to spell disaster for your favorite armchair. The secret to getting rid of a stain is simple: act fast and use the right method for that specific spill.
The biggest mistake I see people make is panicking and scrubbing the stain for dear life. Resist that urge! Scrubbing just grinds the mess deeper into the upholstery fibers, making it a nightmare to remove and potentially ruining the fabric.
Instead, always blot gently with a clean, white cloth. Start at the edges of the stain and work your way in—this helps keep it from spreading.
This visual guide is a great starting point for matching a cleaning method to your furniture's specific needs.
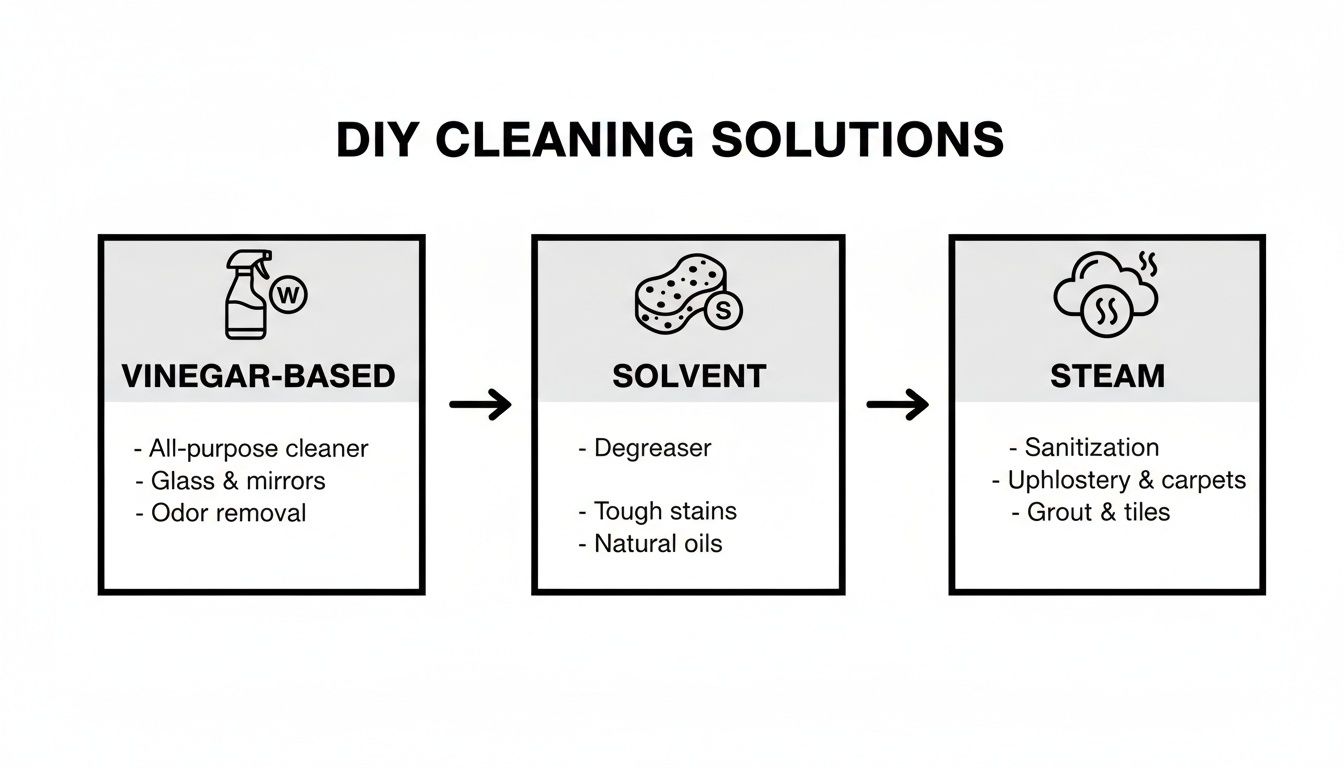
Knowing whether your piece can handle water, a solvent, or just steam is the most critical first step you can take.
A Go-To Formula for Common Spills
It's always smart to have a general spot cleaner ready for fabrics with 'W' or 'W/S' codes. You can actually get professional-level results at home, as 85% of common household stains can be lifted with a simple DIY solution.
Just mix one tablespoon of clear dish soap and one tablespoon of white vinegar into two cups of cool water. Keep it in a spray bottle, and you've got a powerful tool for tackling most everyday accidents.
Your DIY Stain Removal Guide
Different spills need different game plans. You wouldn't treat a greasy pizza stain the same way you'd handle a coffee ring, and having the right homemade solution on hand can make all the difference.
Below is a quick reference table for some of the most common stains we see.
| Stain Type | DIY Solution Recipe | Application Technique |
|---|---|---|
| Coffee, Tea, or Red Wine | 1 tbsp white vinegar, 1 tbsp dish soap, 2 cups cool water | Lightly spray the area, let it sit for 5 minutes, then blot with a clean, damp cloth until the stain is gone. |
| Grease or Oil Stains | Cornstarch or baking soda | Generously cover the stain and let it sit for at least an hour to absorb the oil. Vacuum up the powder afterward. |
| Ink | Rubbing alcohol or hand sanitizer | Dampen a cloth with the alcohol and gently dab the ink spot, being careful not to spread it. |
| Mud | Allow it to dry completely | Once dry, scrape off as much as you can, then vacuum the area thoroughly. Treat any remaining discoloration. |
| Pet Urine | 1 part white vinegar, 1 part water | After blotting, spray the area with the solution to neutralize the odor. Follow up with an enzymatic cleaner. |
These simple recipes leverage ingredients you probably already have, proving you don't need harsh chemicals for a good clean.
A Few More Pointers
- Pet Accidents: You're dealing with both a stain and an odor. After blotting, reach for an enzymatic cleaner made for pet messes. The enzymes in these products literally break down the organic matter causing the stain and the smell. Never use steam or hot water, as the heat can permanently set the stain and odor.
- When Stains Won't Budge: Some spots are just stubborn. If it doesn’t lift on the first try, don’t give up. Just repeat the process. For more advanced techniques, this guide on removing stains from upholstery is a fantastic resource.
If you find yourself constantly battling spills—especially in a home with kids or pets—it might be time to think about furniture that works as hard as you do. The experts at the Willis Furniture Design Center can introduce you to the amazing world of performance fabrics. These materials are engineered to resist stains from the start, making cleanup unbelievably simple.
We can help you customize a piece that’s not only gorgeous but also perfectly suited to your busy life. For more inspiration, check out our guide on how to choose kid-friendly and pet-friendly furniture.
Drying and Deodorizing for a Professional Finish
Getting the stain out is a great first step, but it’s only half the job. The real secret to making your furniture look truly refreshed lies in how you dry and deodorize it. This is where a good cleaning becomes a great one, and skipping these final touches is a classic mistake that can ruin all your hard work.
Improper drying is the biggest culprit behind those annoying water rings, mildew, and musty smells. This is especially true here in the Virginia Beach area, where humidity can be a real challenge. You absolutely have to give your furniture the time and space to dry out completely.
The Secret to a Flawless Dry: Airflow
Your main goal is to get that fabric bone-dry without blasting it with heat. It’s tempting to grab a hairdryer, but direct heat is a fast track to disaster—it can shrink natural fibers or even melt synthetics, causing permanent damage.
The better approach is all about circulation.
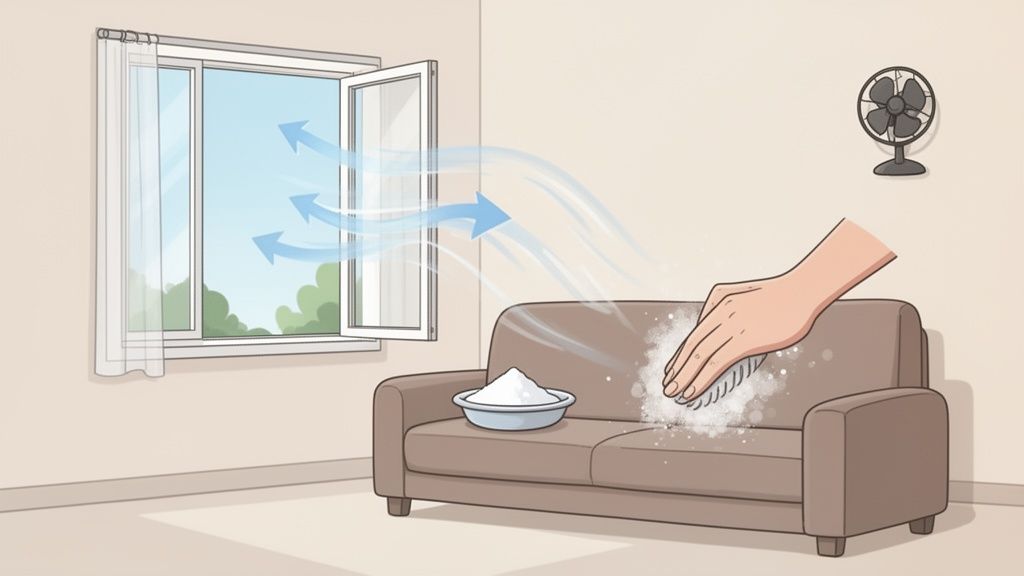
Throw open some windows to get fresh air moving. Then, place a fan or two nearby, aiming them to blow across the damp spot, not directly at it. This gentle, consistent airflow helps moisture evaporate evenly, which is the key to preventing water stains from forming.
Banishing Lingering Odors the Natural Way
Sometimes, even after a deep clean, a faint smell can linger—especially with pet accidents or food spills. Instead of reaching for a scented spray that just covers up the problem, grab a box of baking soda from your pantry. It’s a game-changer because it doesn't just mask odors; it actually absorbs and neutralizes them.
Here's how to do it right:
- Wait for It to Dry: Make sure the upholstery is 100% dry before you even think about this step.
- Sprinkle Liberally: Dust a light, even layer of baking soda all over the furniture. Don’t be shy about adding a little extra on the spots you just cleaned.
- Give It Time: Let the baking soda sit for at least an hour. For really stubborn smells, leaving it overnight is your best bet.
- Vacuum It All Up: Grab your vacuum’s upholstery attachment and go over the entire piece carefully. A few passes will ensure you get all the powder out.
The final touches—proper drying and deodorizing—are what separate a good cleaning job from a great one. They restore not just the look of your furniture, but also its freshness and comfort, making it truly inviting again.
Bringing Back That Soft, Plush Feel
Often, the cleaning process can leave the fabric feeling a little stiff or matted once it dries. The last step is to fluff up those fibers and bring back that soft, inviting texture.
All you need is a soft-bristled upholstery brush. Gently brush the fabric with light, overlapping strokes, following the natural direction of the nap. This simple action revives the texture, gets rid of any stiffness, and gives the whole piece a beautiful, uniform look. It's a small detail that makes a massive difference in the end result.
Keeping Your Furniture Looking Fresh Longer
You’ve put in the work to get your furniture looking brand new again—now, how do you keep it that way? The secret to making your favorite sofa or armchair last isn't just a deep clean every few years. It's the small, consistent bits of care you give it week in and week out.
This is, hands down, the best and most affordable way to protect your investment in quality American-made craftsmanship. A little routine maintenance goes a long way, ensuring you get the most value from your pieces, whether they're a custom design created with our Design Center or a lucky find from the Willis Outlet.
Create a Weekly and Monthly Maintenance Schedule
A little attention on a regular basis is the key to preventing big problems down the road. Think of it as light housekeeping for your furniture.
Your weekly routine can be quick and simple:
- Strategic Vacuuming: Grab your vacuum’s upholstery attachment for the main surfaces and the crevice tool to get into those tight seams and corners. This simple step removes the abrasive dust and grit that slowly wears down fabric fibers. If you have pets, learning how to remove pet hair from furniture is a game-changer for keeping things tidy.
- Cushion Fluffing and Rotating: Give your cushions a good plump to help them keep their shape. If they’re reversible, be sure to flip and rotate them weekly. This ensures they wear evenly on all sides, which makes a huge difference over time.
Once a month, take it a small step further:
- Targeted Spot Checks: Do a quick visual scan for any small spots or spills you might have missed. Catching them early is the best way to prevent them from setting in for good.
- Wipe Down Non-Fabric Areas: Gently wipe down any wood or metal legs and arms to remove dust and smudges.
The Power of a Deeper Clean
Beyond the weekly upkeep, a periodic deep clean is what truly preserves your upholstery. You can replicate the gold standard of professional services right at home with a steam cleaner. Hot water extraction is proven to remove 94% more embedded dirt than dry methods alone.
Doing a steam clean yourself every quarter can deliver professional-level results, helping to preserve the warranty on premium pieces like Willis' Barclay Butera collection. And with our flexible financing options, investing in a premium brand like this is more accessible than ever, allowing you to enjoy lasting quality without compromise.
"Consistency is the key to longevity. A weekly vacuum and a quarterly steam clean do more to preserve your furniture's beauty and structural integrity than a single, aggressive cleaning every five years."
This balanced approach doesn't just keep your furniture looking good; it protects the materials from the inside out. By preventing deep soil buildup, you're also safeguarding the foam cushions and internal frame from the slow damage caused by trapped dirt and moisture.
Protecting Your Investment Proactively
Maintenance isn't just about cleaning—it's also about smart prevention. A few simple habits can dramatically reduce wear and tear.
Try to position your furniture away from direct, harsh sunlight, as UV rays will fade the fabric's color over time. If that sunny spot is just too perfect to give up, use a decorative throw or simply close the blinds during the brightest parts of the day.
Likewise, be mindful of placing furniture too close to air vents. Constant exposure to hot or cold air can dry out and weaken certain fibers. For more ideas on refreshing your entire living space, check out our spring cleaning guide for your whole home. These small, preventative steps ensure your furniture stays clean and remains a beautiful centerpiece in your home for years to come.
When to Call in the Pros for Upholstery Cleaning
Learning to care for your own furniture is a fantastic skill, but part of being a smart homeowner is knowing when to put down the sponge and pick up the phone. Some jobs are simply too big or too delicate for a DIY approach, and calling in an expert can save you from accidentally ruining a piece you love.
There are a few scenarios that should immediately make you think twice. A massive water spill, for example, isn't just a surface problem. Professionals have industrial-strength equipment to pull moisture from deep within the cushions and frame, which is critical for preventing mold and rot. The same goes for finicky, high-end fabrics like silk, jacquard, or velvet. These materials are incredibly sensitive to pH levels and moisture, and a well-intentioned cleaning can easily leave them water-stained or discolored for good.
Navigating the Tricky Situations
Sometimes, the furniture itself tells you when to back off. If you find an ‘X’ code on the cleaning tag, that’s your sign. It means vacuum-only. Trying to clean it with any liquid—water or solvent—is a recipe for disaster and a clear signal to call a professional.
Another good time to call it quits is when you're battling a stubborn, set-in stain that just won't budge. Scrubbing the same spot over and over can actually damage the fabric, leading to thinning, fraying, or a faded patch. The pros have an entire arsenal of specialized treatments and can often lift stains you were sure were permanent.
Knowing when to call a professional isn't giving up; it's making a smart move to protect your investment. An expert can often rescue a piece that might otherwise be lost to a DIY attempt gone wrong.
While we don't offer cleaning services here at Willis, our design consultants are an amazing resource for your next furniture purchase. When it’s time to upgrade or replace a well-loved piece, the experts at our Willis Furniture Design Center can introduce you to the world of modern, high-performance fabrics. They'll help you find a custom upholstery that fits your lifestyle, designed from the ground up to resist stains and make your life easier.
And if you're dealing with a structural problem, we can help there, too. You can learn more about our furniture repair resources to see how we can assist.
Common Questions About Upholstery Care
Even with the best guide in hand, you’re bound to have questions once you start tackling a spill or a deep clean. We get it. Over the years, we’ve heard just about everything, so we’ve put together a few of the most common questions our customers ask. Hopefully, these quick answers give you the confidence you need to get the job done right.
How Often Should I Deep Clean My Furniture?
For most households, a good, thorough deep clean every 12 to 18 months is a solid baseline. This schedule keeps that slow, sneaky buildup of dust, dander, and oils from settling deep into the fibers where a vacuum can't reach.
But life isn't always "average." If you’ve got pets leaving their mark, kids who treat the sofa like a napkin, or family members with allergies, you’ll want to step things up. In that case, cleaning every 6 to 12 months will make a huge difference, keeping your furniture fresh and cutting down on household allergens.
Can I Use a Carpet Cleaner on My Sofa?
We hear this one all the time. The short answer is a very cautious maybe.
It’s tempting, especially since many carpet cleaners have those handy upholstery attachments. The real issue, though, isn't the machine—it's the cleaning solution. Carpet formulas are typically water-based, and if you use one on a sofa with an 'S' (solvent-only) cleaning code, you're asking for trouble. Think permanent water rings and potential fabric ruin.
Your first move must be to check that cleaning code. If your furniture is compatible with water-based cleaners, you still need to do a spot test on a hidden area. You’re looking for any signs of color bleed, shrinkage, or texture change before you commit to cleaning the whole piece.
That dingy, yellowish tint on your beautiful light-colored sofa? It’s often just a buildup of body oils or even the sticky residue left behind by old cleaning products. For fabrics with a 'W' or 'W/S' code, a simple diluted vinegar solution can often work wonders. But if the discoloration is really set in, calling a professional is your safest bet.
And when you're ready for an upgrade, the team at our Willis Furniture Design Center can show you the magic of modern performance fabrics. These incredible materials are engineered from the ground up to resist stains and yellowing, making cleanup a breeze. Imagine having that crisp, light-colored sofa you love without the constant worry—we can help you find it.
At Willis Furniture & Mattress, we believe that a beautiful home should also be a livable one. Our in-house designers are here to help you choose the perfect custom upholstery for your lifestyle, and with our flexible financing options, you can bring your vision to life. Come explore our collections and design services today.
Learn more at https://www.willisfurniture.com.
